
kenmore stacked washer dryer manual
Kenmore Stacked Washer Dryer Manual: A Comprehensive Guide
This guide offers detailed instructions for Kenmore stacked units, covering setup, troubleshooting, maintenance, and repair – essential for owners seeking to maximize appliance lifespan.
Understanding Your Kenmore Stacked Unit
Kenmore stacked washer-dryer combinations offer space-saving convenience, integrating both laundry functions into a single footprint. These units typically feature the washer positioned at the bottom and the dryer stacked securely on top, utilizing a stacking kit for stability.
Operation differs slightly from traditional setups; the washer controls (dials) are generally located on the right side, while the dryer controls reside on the left. Familiarizing yourself with this layout is crucial. Successful operation requires understanding that turning the large dial on the right initiates a wash cycle, while the left-side dials manage dryer settings.
Disassembly, should it become necessary, involves carefully removing the stacking kit brackets and lifting the dryer off the washer – a task best performed with assistance to prevent damage or injury.
Identifying Washer and Dryer Controls
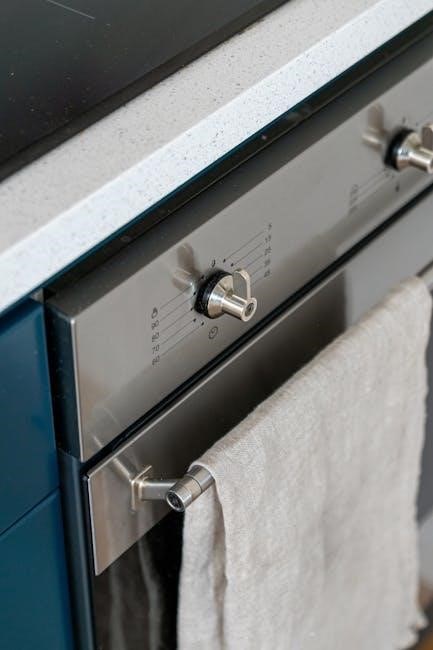
Kenmore stacked units streamline laundry with integrated controls. A key distinction is the physical separation of washer and dryer operation. The washer’s controls are consistently found on the right side of the unit, featuring a prominent dial for cycle selection. To initiate a wash, turn this dial and pull it outwards – a simple, direct action.
Conversely, the dryer’s controls are located on the left side. These dials govern drying temperature, time, and specialized cycles. Understanding the function of each dial is vital for optimal clothing care.
Remember, the bottom unit is always the washer, and the top unit is the dryer. This clear demarcation simplifies operation and troubleshooting.
Washer Dial Operation (Right Side)
The washer dial, situated on the right, is your primary interface for selecting wash cycles. Turning the dial allows you to navigate through options like Normal, Delicates, Heavy Duty, and Quick Wash – each tailored for specific fabric types and soil levels.
Crucially, simply turning the dial doesn’t start the machine. After selecting your desired cycle, you must pull the dial outwards. This action initiates the water fill and wash process.
Some models may include additional buttons surrounding the dial for options like temperature control or extra rinse cycles. Familiarize yourself with these features to customize your wash.
Dryer Dial Operation (Left Side)
The dryer dial, located on the left, controls the drying process. It features settings like Automatic, Timed Dry, Delicate, and Air Fluff, catering to various fabric needs and desired dryness levels.
“Automatic” cycles utilize moisture sensors to determine when clothes are dry, preventing over-drying and saving energy. “Timed Dry” allows you to set a specific drying duration.
Similar to the washer, selecting a cycle isn’t enough. You typically need to press a separate “Start” button to initiate the drying process. Be mindful of heat settings – higher heat is suitable for durable fabrics, while lower heat protects delicates.
Initial Setup and Installation
Proper installation is crucial for optimal performance. Begin by ensuring a level surface; adjust the leveling feet on both the washer and dryer to prevent vibrations and noise. Connect the water supply hoses to the washer, verifying a secure, leak-proof fit.
The dryer requires a dedicated 240V electrical outlet – do not use an extension cord. Vent the dryer properly to the outside, using rigid or flexible ductwork, avoiding kinks or obstructions.
Once stacked, secure the units with the provided stacking kit brackets, ensuring they are firmly attached. Finally, run an initial empty cycle for both the washer and dryer to flush out any manufacturing residue.
Safety Precautions Before Maintenance
Prioritize safety before any maintenance. Always disconnect the power supply by unplugging the unit from the electrical outlet. Shut off the water supply to the washer to prevent accidental flooding. Allow all components to cool down completely before handling, especially the dryer’s heating elements.
Wear appropriate safety gear, including gloves and eye protection, to shield against sharp edges and potential irritants. Never attempt repairs while the unit is still connected to power or water.
If using tools, ensure they are insulated and in good working condition. Be mindful of potential pinch points during disassembly and reassembly.
Troubleshooting Common Washer Issues
Washer malfunctions can disrupt laundry routines. Common problems include the washer failing to receive power, often due to a tripped breaker or loose connection. Addressing this requires checking the electrical supply and wiring. Another frequent issue is the washer not draining, potentially caused by a clogged drain pump or hose – inspect and clear any obstructions.
If the washer isn’t spinning, examine the drive belt for damage or looseness. A multimeter can aid in diagnosing electrical faults within the motor or control board. Always disconnect power before internal inspection.
Washer Not Receiving Power
A lack of power to the washer is often a simple fix. First, verify the power cord is securely plugged into a functioning outlet. Next, check your home’s circuit breaker panel – a tripped breaker is a common culprit. Reset the breaker if necessary. If the breaker trips again immediately, there may be a short circuit requiring professional attention.
Inspect the outlet itself using a different appliance to confirm it’s delivering power. Examine the wiring connections at the back of the washer for looseness or damage. Always disconnect power before inspecting any electrical components to prevent shock.

Washer Not Draining
If your Kenmore washer isn’t draining, several issues could be at play. Begin by checking the drain hose for kinks or obstructions. Ensure the hose isn’t clogged or bent, restricting water flow. Next, inspect the drain pump filter – it’s designed to catch lint and debris, and can become blocked. Locate and carefully clean the filter, following the manual’s instructions.
A clogged drain pump itself is another possibility. Accessing and inspecting the pump may require some disassembly. Consider professional help if you’re uncomfortable with this step. Finally, verify the drain hose is properly inserted into the standpipe and isn’t pushed in too far.
Washer Not Spinning
A Kenmore washer failing to spin can stem from several causes. First, ensure the load is balanced. An unevenly distributed load can prevent the spin cycle from engaging as a safety measure. Try redistributing the clothes inside the drum. Next, check the lid switch – the washer won’t spin if it doesn’t detect a closed lid.
A faulty drive belt is a common culprit; inspection requires accessing the washer’s internal components. If you’re comfortable, visually check the belt for wear or breakage. Finally, a malfunctioning motor or motor control board could be the issue, often requiring professional diagnosis and repair.
Troubleshooting Common Dryer Issues
Common dryer problems often involve a lack of heat or the dryer failing to start. If the dryer has power but isn’t heating, suspect a faulty heating element, thermostat, or thermal fuse. Accessing these components typically requires removing the dryer’s top panel. Continuity testing with a multimeter is crucial to pinpoint the defective part.
For a dryer that won’t start, verify the power supply and check the door switch. A faulty switch prevents operation. Additionally, inspect the drive belt and motor for issues. Remember safety first – always disconnect power before any internal inspection or repair attempts.
Dryer Not Heating
A dryer failing to heat is a frequent issue. Begin by confirming the dryer receives power. If so, the problem likely lies within the heating system. Key components to check include the heating element, thermostats (cycling and high-limit), and the thermal fuse. These parts often require access by removing the dryer’s top panel.
Using a multimeter to test for continuity is vital. A broken heating element or a blown thermal fuse will show no continuity. Thermostats can also fail, preventing the element from activating. Always disconnect power before testing any electrical components for safety.
Checking Dryer Thermostats and Heater Continuity
To diagnose a no-heat situation, begin by accessing the dryer’s internal components – typically requiring top panel removal. Locate the cycling thermostat, high-limit thermostat, and thermal fuse. Disconnect the wires from each component before testing. Use a multimeter set to the continuity setting.
Touch the multimeter probes to the terminals of each thermostat and the thermal fuse. A functioning component will show continuity (a beep or a reading close to zero ohms). No continuity indicates a failed part needing replacement. Also, check the heating element for continuity; a break signifies it needs replacing.
Dryer Has Power, Washer Has No Power
If the dryer operates while the washer remains lifeless, the issue likely resides within the washer’s power supply or control board. Begin by verifying the power cord is securely plugged into a functioning outlet. Inspect the circuit breaker or fuse dedicated to the laundry area – a tripped breaker or blown fuse is a common culprit.
Remove the washer’s access panel (above the door) and use a multimeter to check for voltage at the power inlet. If voltage is present but the washer still lacks power, the problem likely lies with the washer’s control board or door lock switch. Further diagnostics are needed to pinpoint the exact cause.
Disassembly and Separation
Separating the stacked units requires careful execution to prevent damage. First, and crucially, disconnect both the power supply and all connected hoses – water supply and dryer vent. Locate the stacking kit brackets, typically secured with screws or clips along the sides or rear of the units. Remove these brackets to release the dryer’s hold on the washer.
With assistance, carefully lift the dryer straight upwards, avoiding any rocking or tilting motions. Ensure a clear path and a stable surface for the dryer. Proper lifting technique is essential to prevent injury and appliance damage. Once clear, the washer and dryer can be moved independently.
Disconnecting Power and Hoses
Before any disassembly, safety is paramount. Completely disconnect the power supply by unplugging the washer-dryer combo from the electrical outlet. Next, shut off the water supply valve to the washer. Carefully detach the water inlet hose from the back of the washer, having a bucket nearby to catch any residual water.
For the dryer, disconnect the vent hose, ensuring it’s free from lint buildup. Inspect the hoses for any signs of wear or damage before removal. Properly draining any remaining water prevents messes and potential mold growth. Double-check that all connections are fully disconnected before proceeding.
Removing the Stacking Kit Brackets
Locate the stacking kit brackets, typically found on the sides or back of the units where the dryer connects to the washer. These brackets are usually secured with screws or clips. Using a Phillips screwdriver, carefully remove all screws holding the brackets in place. Note the position of each bracket for potential reassembly later.
Some kits utilize clips that require gentle prying to release. Avoid excessive force to prevent damage to the appliance housings. Once all brackets are removed, the dryer will no longer be mechanically fastened to the washer, but still requires careful lifting. Ensure all fasteners are safely stored for future use.
Carefully Lifting the Dryer Off the Washer
This step requires assistance due to the dryer’s weight and bulk. Ensure you have a helper to prevent injury or damage to the appliances. Grip the dryer firmly on opposite sides, maintaining a secure hold throughout the lift. Lift slowly and evenly, avoiding any sudden movements or jerks.
Clear a sufficient space around the washer to accommodate the dryer. Lift the dryer straight up, just enough to clear the washer’s top surface. Carefully move the dryer to a safe, stable location. Avoid dragging the dryer across the floor to prevent scratches or damage. Proceed with caution and prioritize safety.
Basic Maintenance Procedures
Regular maintenance extends the life of your Kenmore stacked unit. Clean the washer’s dispenser monthly to prevent residue buildup. Run a cleaning cycle with washer cleaner quarterly. Inspect and clean the dryer’s lint filter after every load – a crucial fire safety step. Periodically check and clean the dryer vent hose to maintain efficient airflow.
Wipe down exterior surfaces with a damp cloth. Inspect hoses for cracks or leaks. Ensure proper leveling of the unit to minimize vibration. Avoid overloading either the washer or dryer. Following these simple steps will help ensure optimal performance and prevent costly repairs.
Diagnosing Washer Problems with a Multimeter
A multimeter is invaluable for pinpointing washer faults. First, check for voltage at the power inlet to confirm power supply. Test the door switch for continuity – an open circuit prevents operation. Inspect the motor windings for shorts or opens. Check the water inlet valve for proper resistance.

Verify the operation of the timer or electronic control board by testing its outputs. A lack of continuity in the heating element (if applicable) indicates failure. Always disconnect power before testing. Refer to a wiring diagram for correct component locations and expected readings. Safety first – proceed with caution!
Diagnosing Dryer Problems with a Multimeter
Utilizing a multimeter is crucial for dryer diagnostics. Begin by testing the heating element for continuity; an open circuit signifies a failed element. Check thermostats and thermal fuses for continuity – these often fail causing no-heat issues. Verify the motor windings for shorts or opens, ensuring proper operation.
Inspect the gas valve (gas dryers) or control board outputs (electric dryers) for correct voltage. Test the timer or electronic control for proper signals. Always disconnect power before testing components. Refer to the wiring diagram for accurate readings and component locations. Prioritize safety during all testing procedures.
Accessing Internal Components
To access dryer internals, carefully remove the top panel, typically secured with screws at the rear; For the washer, begin by disconnecting power and removing the access panel above the door. This reveals the internal components, allowing inspection and testing. Be cautious of sharp edges and wiring.
Always unplug the unit before disassembly. Document wire connections before disconnecting them for reassembly. Refer to diagrams if available. Take photos during disassembly to aid in remembering component placement. Exercise care when handling delicate parts. Proper access is key for effective diagnosis and repair.
Removing Dryer Top Panel
Begin by disconnecting the dryer from the power source. Locate the screws securing the dryer’s top panel, usually at the rear of the unit. Carefully remove these screws, storing them in a safe place. Gently slide the top panel backward, releasing it from the retaining clips. Lift the panel upwards and away from the dryer cabinet.
Exercise caution as the panel may be heavier than expected. Inspect the area for any hidden screws or connections before fully removing the panel. Take note of any wiring harnesses or components attached to the underside of the panel. This access allows inspection of thermostats and the heater for continuity checks.
Accessing Washer Internal Components
First, ensure the washer is unplugged from the electrical outlet. Remove the top panel, typically secured with screws at the rear. Next, detach the control panel, often held in place by clips or screws, and carefully lift it up. This reveals access to the internal wiring and electronic components.
To reach the pump or motor, you may need to remove the front panel, usually secured with screws around the perimeter. Be mindful of any water hoses or wiring connected to these components. Consult online resources or diagrams for specific model layouts. Proper access is crucial for diagnosing power issues and tracing circuits with a multimeter.
Repairing Common Washer Faults
Addressing a washer that won’t drain often involves checking the drain pump for obstructions – lint, small objects, or even socks! If the pump is clear, test its continuity with a multimeter. For spin cycle failures, inspect the drive belt for wear or breakage, and verify the motor’s functionality.
Power issues can stem from a faulty door switch or a blown thermal fuse. Use a multimeter to test these components. Remember to always disconnect power before any repair. Replacing these parts is often straightforward, but consult diagrams for your specific model. Always prioritize safety and proper grounding.
Repairing Common Dryer Faults
A dryer failing to heat is a frequent issue, often traced to a faulty heating element, thermostat, or thermal fuse. Accessing these components requires removing the dryer’s top panel. Utilize a multimeter to test for continuity – a break indicates a failed part. Inspect the thermostats carefully, as they regulate temperature and prevent overheating.
If the dryer has power but doesn’t heat, focus on the heating element and associated safety devices. Ensure proper ventilation; a clogged vent restricts airflow and causes overheating. Always disconnect power before any repair work. Replacing these parts is generally manageable, but diagrams are crucial.
Finding Replacement Parts
Sourcing replacement parts for your Kenmore stacked unit requires identifying the model number, typically found on a label inside the washer or dryer door. Online retailers specializing in appliance parts, such as Appliance Parts Pros, offer extensive catalogs and diagrams. Local appliance repair shops can also source parts, often providing expert advice.
When ordering, verify compatibility with your specific model. Generic parts may fit, but OEM (Original Equipment Manufacturer) parts are generally recommended for optimal performance and longevity. Consider checking online forums and communities for recommendations on reliable suppliers. Keep the model number handy for a smooth and accurate search.
Understanding Error Codes (If Applicable)
Modern Kenmore stacked washer dryers may display error codes to indicate specific malfunctions. Unfortunately, comprehensive error code lists aren’t universally available for all models. Consult your specific unit’s documentation if available, or search online forums dedicated to Kenmore appliances. Common codes often relate to water inlet issues, drainage problems, or motor failures.
Interpreting these codes can guide troubleshooting efforts; For example, a code indicating a water inlet error suggests checking the water supply and inlet valve. Always disconnect power before investigating any internal components. If the code persists, professional service may be required for accurate diagnosis and repair.
Stacking Kit Components and Function
The stacking kit securely joins the dryer to the washer, ensuring stability and preventing movement during operation. Typically, it includes brackets that attach to the sides or back of both appliances, often secured with screws or clips. These brackets are crucial for safe operation, preventing the dryer from falling.
Proper installation is vital; ensure the kit is compatible with your specific Kenmore models. When separating the units for maintenance, carefully remove these brackets. Remember to support the dryer’s weight during removal to avoid damage or injury. Inspect the kit for any damage before re-stacking.
Tools Needed for Repair and Maintenance
Essential tools for maintaining your Kenmore stacked unit include a Phillips head screwdriver for accessing panels and components. A multimeter is crucial for diagnosing electrical issues, checking continuity of thermostats and heaters. Pliers are useful for disconnecting hoses and wires, while a socket set aids in removing larger components.
Safety is paramount; always have work gloves to protect your hands. Consider a nut driver for specific fasteners. For disassembly, a flathead screwdriver may be needed. Don’t forget a container to hold screws and small parts, preventing loss during repairs.
Safety Gear Recommendations
Prioritize safety when working on your Kenmore stacked washer and dryer. Always wear sturdy work gloves to protect your hands from sharp edges and potential electrical hazards. Eye protection, such as safety glasses, is crucial to prevent debris from entering your eyes during disassembly or repair.
Electrical safety demands caution; ensure the unit is unplugged before any work begins. Consider a dust mask to avoid inhaling dust or mold, especially when accessing internal components. Appropriate footwear, like closed-toe shoes, is also recommended. Remember, working with appliances involves risks – prioritize your well-being!
Resources for Further Assistance
For additional support beyond this manual, several resources are available. The r/Appliances subreddit offers a community forum for questions and shared experiences with Kenmore stackable units. Appliance Repair Forums, like those at DoItYourself.com and Appliance Parts Pros, provide expert advice and troubleshooting assistance.
Instructables features user-submitted guides, including fixes for Kenmore stack washers. Manufacturer websites may offer specific documentation or FAQs. Local appliance repair technicians can provide professional diagnostics and repairs. Remember to have your model number handy when seeking assistance for accurate information!